# How to build your own IPMI with PIKVM
## Backstory
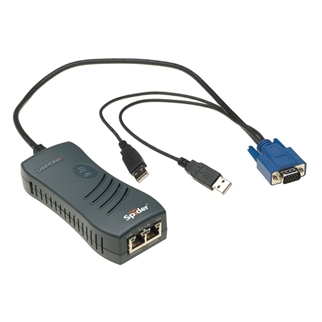
Recently I needed to remotely reinstall an operating system on an old server in a remote data center. To do this servers typically use the IPMI protocol and remotely provide access to a computers keyboard mouse and display, even when the computer is off. However the hardware I was working with did not support this. Even if it did, often times IPMI uses old out dated software and is deemed a security threat and disabled. The cheapest commercial solution I could find was the Lantronix Spider.
https://www.lantronix.com/products/lantronix-spider/
Here's how that process goes.
You go to ebay and buy a $200-$300 device used.
Mail it to a colleague and have them plug in a network cable, connect a pair of usbs, and connect a vga cord.
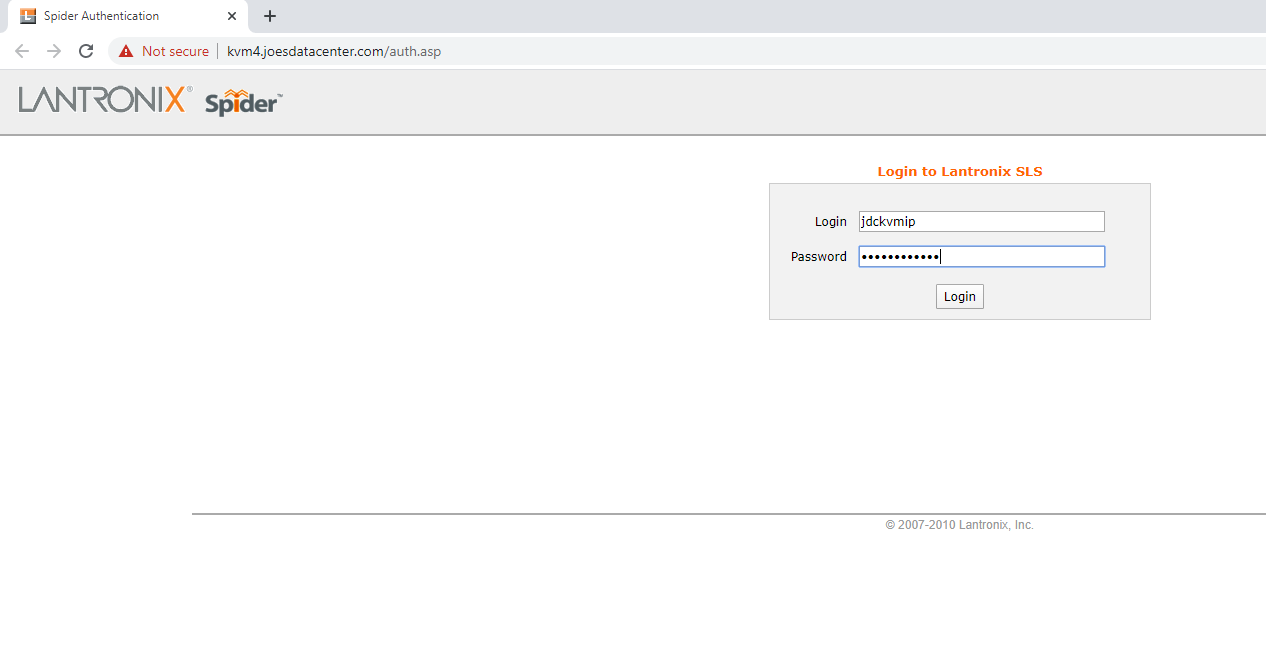
They'll then have to manually allow the network connection through the firewall. Fun.
Hopefully you can now navigate to the website and login.
Well that was simple enough so far, now click on the picture of your computer
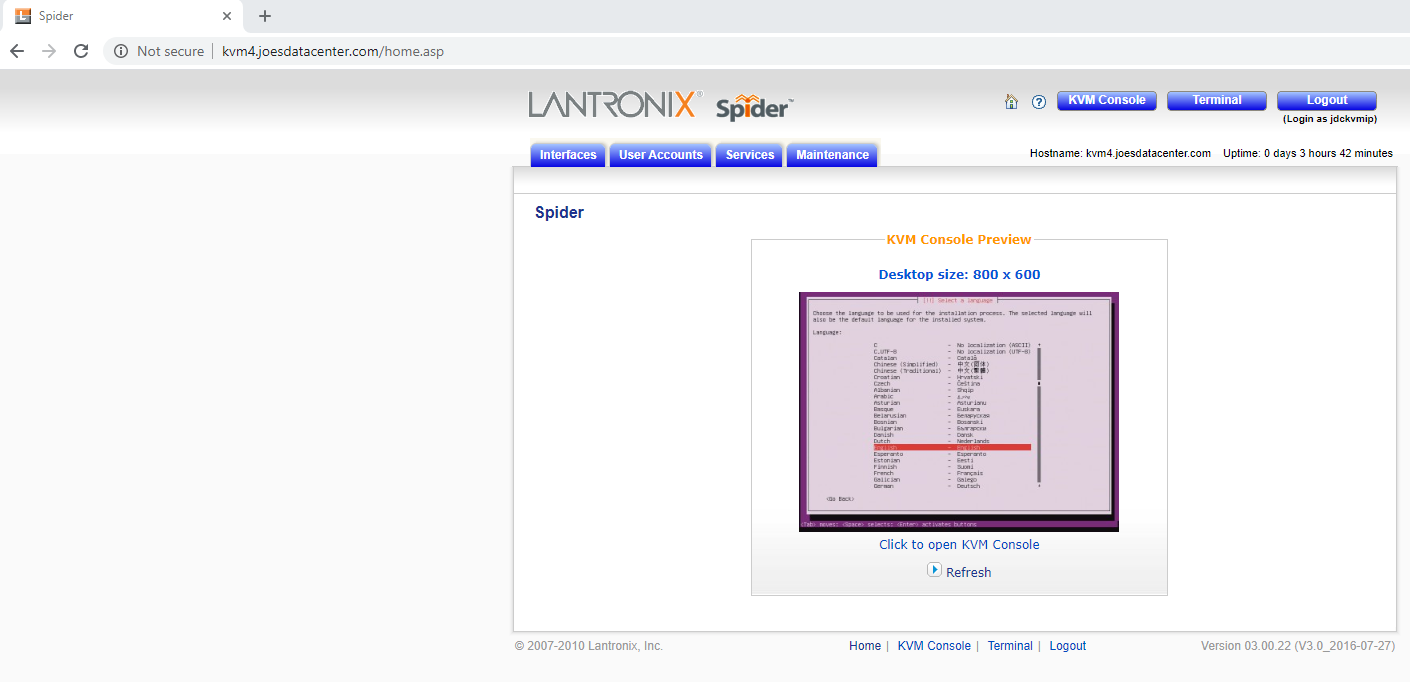
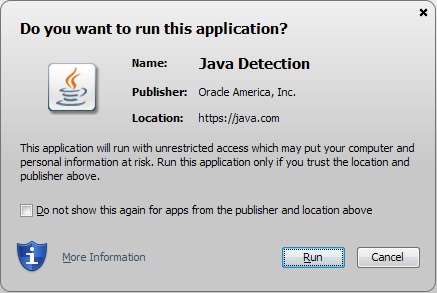

Install java, go back, cross your fingers and hope it is happy with the latest java and open the app again, finally we can remotely control the computer.
Ok few questions here:
- Why are we still using java?
- Why does this cost so much?
- Can I trust this device?
With some research I found I wasn't the first person that thinks this is absolutely crazy and there are some open source projects.
- https://github.com/hradec/poors-man-ip-kvm
- https://github.com/macpczone/keyboard-passthrough
- https://github.com/SterlingButters/ip-kvm-interface/
- https://github.com/Fmstrat/diy-ipmi
- https://github.com/pikvm/docs
The first three are far less polished.
At the core, these projects do the same thing, they either use a Raspberry Pi with OTG support or use a serial to HID with an arduino.
I wanted to do this cheap, securely, and with the least amount of hardware.
After taking a closer look at PIKVM, while NOT documented, I discovered you don't actually need a Raspberry PI and can do this with a spare computer and about $10 in parts.
Let's start this journey with the shopping.
# Shopping
We'll need devices, straight from china is obviously cheaper here, but that can take way longer.
## Composite Capture Card
Devices with UTV007 chipsets are cheap and have good linux support.
- https://www.aliexpress.com/item/32914705857.html
- https://www.ebay.com/sch/i.html?_nkw=easyday+dc60
- https://www.amazon.com/easyday-DC60-Capture-Software-Compatible/dp/B0126O0RDC/
## Hdmi to AV Converter
Make sure to get a converter box and not just a cord. You can also find something with vga support if you want.
Compatibility can be hit or miss with these. You might have to yolo your order.
- https://www.aliexpress.com/item/32827336135.html
- https://www.ebay.com/sch/i.html?_nkw=hdmi+to+av
- https://www.amazon.com/RCA-GANA-Composite-Converter-Adapter-Supporting/dp/B01KXI8LZE
## Arduino Pro Micro 5v ATmega32U4
Make sure to get a 5v model. Name brand costs a lot more.
- https://www.aliexpress.com/item/32768308647.html
- https://www.ebay.com/sch/i.html?_nkw=atmega3u4
- https://www.amazon.com/s?k=atmega32u4
## CP2102 5v USB to Serial
- https://www.aliexpress.com/item/1859102520.html
- https://www.ebay.com/sch/i.html?_nkw=cp2102
- https://www.amazon.com/s?k=cp2102
## Wire and USB
I had these lying around, but you will need a standard micro usb cable and something to connect your USB serial to the arduino.
With everything ordered we'll need to start setting up our computer.
# Walkthrough
Find a spare computer you would like to install pikvm on and install Ubuntu 18.04 x64 Desktop
https://ubuntu.com/tutorials/tutorial-install-ubuntu-desktop
Once we have an operating system installed, we can continue with installing pikvm
## Installing dependencies
From a terminal
```
sudo apt install -y git make curl binutils python3-pip openssh-server
```
Install platformio, you need to use an old version listed in pikvm/packages
```
sudo pip3 install 'platformio==4.0.2'
```
Install docker
```
curl -fsSL https://get.docker.com -o get-docker.sh
sudo sh get-docker.sh
sudo usermod -aG docker $USER
```
Grab a copy of pikvm
```
git clone https://github.com/pikvm/kvmd.git
```
and reboot
```
reboot
```
With everything in place we can write software to the arduino.
## Flashing Arduino
Plug in a micro usb cable into the arduino and plug the other end into a usb port on your computer.
Login and open a terminal.
Compile and flash the arduino
```
cd kvmd/hid
make
sudo make install
cd ..
```
Now unplug the USB from your computer, turn on your soldering iron, and wire up the USB serial adapter to the arduino like so:
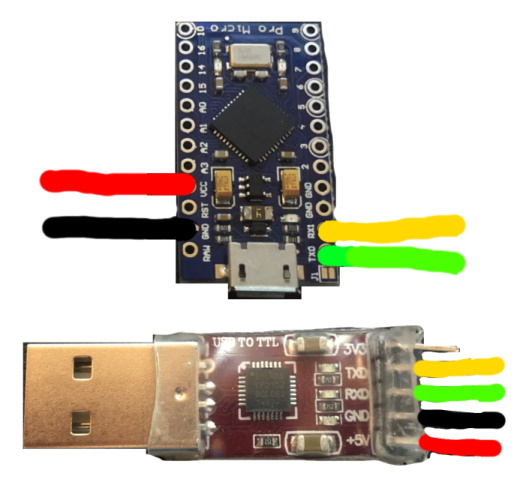
- Connect the usb serial adapter to your computer.
- Connect the usb capture card to your computer.
- Connect the usb capture card to a converter box.
- Connect the converter box video to the computer you want controlled.
- Connect the micro usb from the arduino to the computer you want controlled.
With everything plugged in we can edit some of the config files for pikvm
## Configuring pikvm
First we need to edit the Makefile for the project.
The variables at the top need to be changed.
`TESTENV_LOOP` needs to be the next available loop device.
Run `losetup -a` to print your loop devices. I had 1-8 listed so I changed `/dev/loop7` to `/dev/loop9`
`TESTENV_VIDEO` should already be `/dev/video0`
`TESTENV_HID` should be changed to `/dev/ttyUSB0`
Now we need to connect the serial port to the docker container
Near line 75, inside `run: testenv` find `--device $(TESTENV_VIDEO):$(TESTENV_VIDEO) \` and add
```
--device $(TESTENV_HID):/dev/ttyS10 \
```
Now we need to edit the config file for the test environment.
```
nano testenv/v1-vga-rpi3.override.yaml
```
The serial device should already be set to `/dev/ttyS10`
Remove the `noop: true` to enable the arduino
Finally we can start pikvm
# Running pikvm
Use make to build and run the docker container
```
sudo make run P=v1-vga-rpi3
```
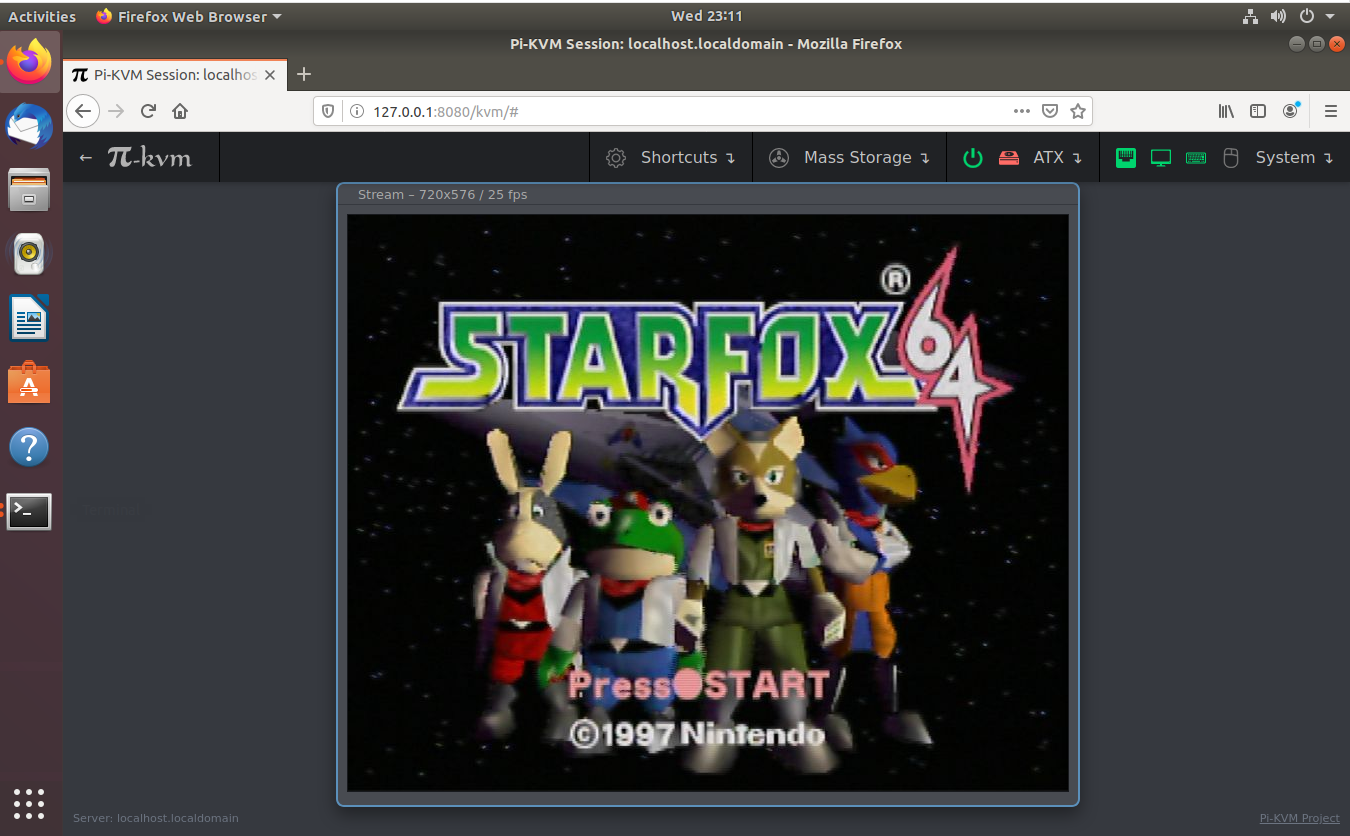
Open a browser and connect to 127.0.0.1:8080 and login with admin/admin and click on KVM
You should be able to see and control the connected computer
Setup a reverse SSH tunnel at boot with `autossh` and you now have a remotely accessible IP KVM.
Cheers!